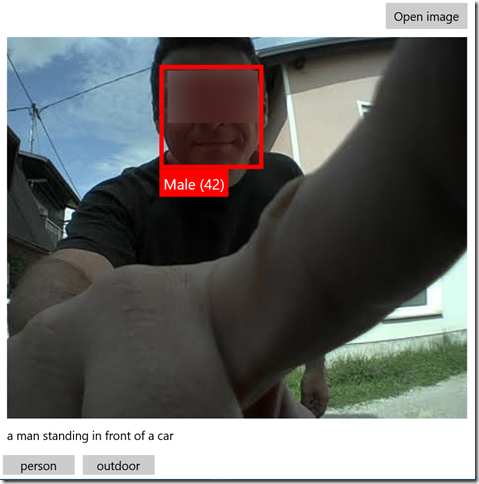
Similar to Face API, Computer Vision API service deals with image recognition, though on a bit wider scale. Computer Vision Cognitive Service can recognize different things on a photo and tries to describe what's going on - with a formed statement that describes the whole photo, a list of tags, describing objects and living things on it, or, similar to Face API, detect faces. It can event do basic text recognition (printed or handwritten).
Create a Computer Vision service resource on Azure
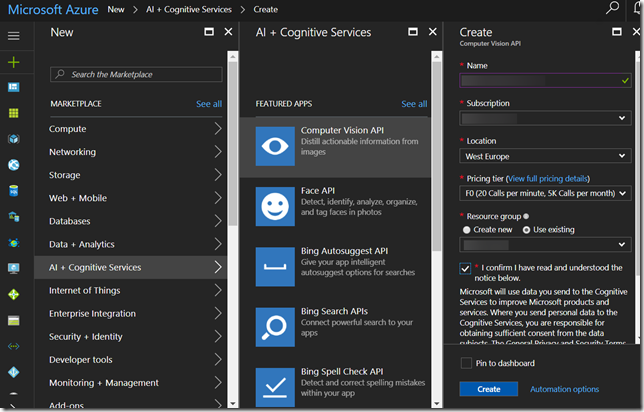
To start experimenting with Computer Vision API, you have to first add the service on Azure dashboard.

The steps are almost identical to what I've described in my Face API blog post, so I'm not going to describe all the steps; the only thing worth of a mention is the pricing: there are currently two tiers: the free tier (F0) is free and allows for 20 API calls per minute and 5.000 calls per month, while the standard tier (S1) offers up to 10 calls per second. Check the official pricing page here.
Hit the Create button and wait for service to be created and deployed (should take under a minute). You get a new pair of key to access the service; the keys are, again, available through the Resource Management -> Keys section.
Trying it out
To try out the service yourself, you can either try the official documentation page with ready-to-test API testing console, or you can download a C# SDK from nuget (source code with samples for UWP, Android & iOS (Swift).
Also, source code used in this article is available from my Cognitive Services playground app repository.
For this blog post, I'll be using the aforementioned C# SDK.
When using the SDK, The most universal API call for Computer Vision API is the AnalyzeImageAsync:
var result = await visionClient.AnalyzeImageAsync(stream, new[] {VisualFeature.Description, VisualFeature.Categories, VisualFeature.Faces, VisualFeature.Tags});
var detectedFaces = result?.Faces;
var tags = result?.Tags;
var description = result?.Description?.Captions?.FirstOrDefault().Text;
var categories = result?.Categories;
Depending on visualFeatures parameter, the AnalyzeImageAsync can return one or more types of information (some of them also separately available by calling other methods):
- Description: one on more sentences, describing the content of the image, described in plain English,
- Faces: a list of detected faces; unlike the Face API, the Vision API returns age and gender for each of the faces,
- Tags: a list of tags, related to image content,
- ImageType: whether the image is a clip art or a line drawing,
- Color: the dominant colors and whether it's a black and white image,
- Adult: indicates whether the image contains adult content (with confidentiality scores),
- Categories: one or more categories from the set of 86 two-level concepts, according to the following taxonomy:

The details parameter lets you specify a domain-specific models you want to test against. Currently, two models are supported: landmarks and celebrities. You can call the ListModelsAsync method to get all models that are supported, along with categories they belong to.

Another fun feature of Vision API is recognizing text in image, either printed or handwritten.
var result = await visionClient.RecognizeTextAsync(stream);
Region = result?.Regions?.FirstOrDefault();
Words = Region?.Lines?.FirstOrDefault()?.Words;
The RecognizeTextAsync method will return a list of regions where printed text was detected, along with general image text angle and orientation. Each region can contain multiple lines of (presumably related) text, and each line object will contain a list of detected words. Region, Line and Word will also return coordinates, pointing to a region within image where that piece of information was detected.
Also worth noting is the RecognizeTextAsync takes additional parameters:
language – the language to be detected in the image (default is “unk” – unknown),
detectOrientation – detects the image orientation based on orientation of detected text (default is true).
Source code and sample app for this blog post is available on
github.
ffa3415d-15fb-4bde-9625-ce8d38d15219|9|1.2|27604f05-86ad-47ef-9e05-950bb762570c