One of the best features I’ve found in using Windows 10 IoT Core on my home Raspberry Pi (which is a small, inexpensive piece of hardware) is, it can do voice synthesis very well (i.e. it can “speak”). While Windows developers could develop applications with this same functionality for quite a long time, I was still overwhelmed when I saw such small device say anything I ordered it to. It currently may not support all the options and voices older platforms do, but it’s more than enough for scenarios like home automation, notifications, etc. The fact that Windows 10 IoT Core even supports Cortana means Microsoft has big plans for IoT Core and voice recognition an synthesis.
When building my house a few years ago, I’ve put in a pair of audio cables going to both of two floors, to be later able to install two small (but powerful) speakers into a central ceiling of each floor. A private little whole house audio/ambient music system, if you will. I’ve plugged them into an amplifier installed in my utility room and connected to a Raspberry Pi running Windows IoT Core. [Sure, it’s all possible and doable wireless as well, but I’d still trust wired installations over wireless, so if given a chance, I’d pick wires anytime].
Windows 10 IoT Core
So Why Windows IoT Core? Just because it could run Windows Universal apps (where speech synthesis was supported) and I’ve already known UWP very well and have worked with the API several times in the past - it was a perfect fit.
Having wired my whole house audio system to Raspberry Pi gave me quite a few gains:
- telling time – my house reports the time every hour, on the hour. I’ve got quite used to this in the past two years, as it’s quite useful to keep track of time, especially when you’re busy; it’s really nonintrusive.
- status notifications – I have my whole house wired and interconnected with my smart home installation so anything important I don’t want to miss (like low water level, motion detection, even weather report) can be reported audibly, with detailed spoken report;
- door bell – I also have my front door bell wired to the Raspberry Pi. It can play any sound or speech when somebody rings a bell;
- calendar – every morning, shortly before it’s time to go for work or school, I can hear a quick list of activities for that day – kids’ school schedule, any scheduled meetings, after-school activities, … along with weather forecast;
- background music – not directly speech related, but Raspberry Pi with Windows IoT is also a great music player. Scheduled in the morning for when it’s time to get up, it quietly starts playing the preset internet radio station.
These are just a few examples of how I’m finding Windows 10 IoT Core speech capabilities on Raspberry Pi useful and I’m regularly getting ideas for more. For this blog post, however, , I’d like to focus on showing how easy it is to implement the first case from the above list – telling time – using Visual Studio to create a background Universal Windows Application and deploy it to Raspberry Pi running Windows 10 IoT Core.
Development
What I’ll be using:
- Visual Studio 2017 – see here for downloads,
- Raspberry Pi 3 with latest Windows 10 IoT Core installed – see here for download and instructions on how to install it.
I’ll also be using the Background Application IoT Visual Studio template. To install IoT Core templates, install Windows IoT Core Projects extension using the Extensions and Updates menu option:
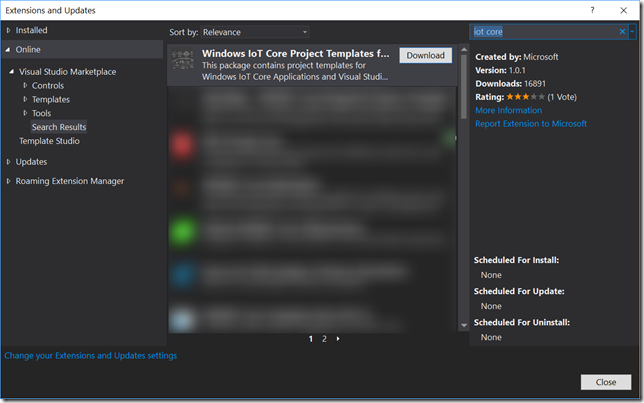
After that (possibly restart Visual Studio – installing may also take some time for additional downloads), create a new IoT project (File | New | Project…):
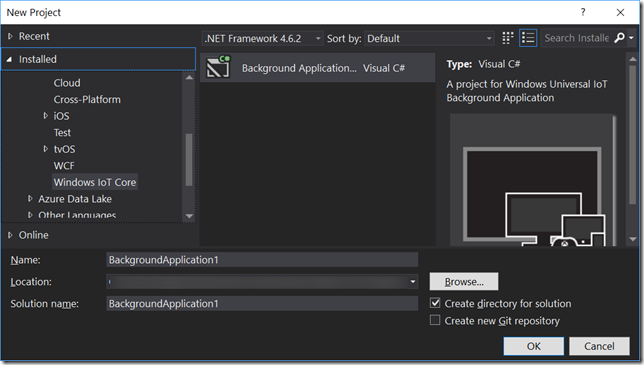
Select the Windows IoT Core template group on the left and pick the only template in that group – Background Application (IoT). Enter a project name and Click OK to create the project.
After project is created, add the BackgroundTaskDeferral line to prevent background service exiting too early:
private BackgroundTaskDeferral deferral;
public void Run(IBackgroundTaskInstance taskInstance)
 {
     deferral = taskInstance.GetDeferral();
}
Then add the following class:
internal class SpeechService
{
    private readonly SpeechSynthesizer speechSynthesizer;
     public SpeechService()
     {
         speechSynthesizer = CreateSpeechSynthesizer();
     }
    private static SpeechSynthesizer CreateSpeechSynthesizer()
     {
     }
}
This is just an internal class that currently does nothing but trying to create a class called SpeechSynthesizer.
SpeechSynthesizer
The SpeechSynthesizer class has been around for quite a while and in various implementations across different frameworks. I’ll use the one what we’ve currently got on Windows 10 / UWP, where it sits under the Windows.Media.SpeechSynthesis namespace.
In the above code, something’s missing – the code that actually creates the SpeechSynthesizer object. Turns out it’s not very difficult to to that:
var synthesizer = new SpeechSynthesizer();
return synthesizer;
But there’s more… First, you can give it a voice you like. To get the list of voices your platform supports, inspect the SpeechSynthesizer.AllVoices static property. To enumerate through all the voices you can use this:
foreach (var voice in SpeechSynthesizer.AllVoices)
{
     Debug.WriteLine($"{voice.DisplayName} ({voice.Language}), {voice.Gender}");
}
The above code would vary depending on which language(s) you have installed. For example, English language only would give you:
Microsoft David Mobile (en-US), Male
Microsoft Zira Mobile (en-US), Female
Microsoft Mark Mobile (en-US), Male
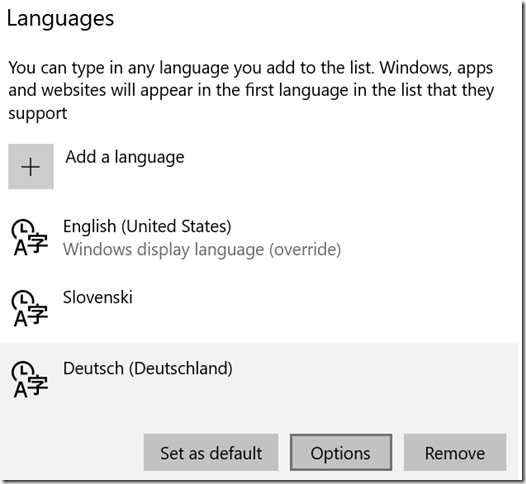
Also note that not all languages support speech synthesis. To add one or check what’s supported, go to Region & Language settings and click on the language you want to add speech support for. Example for German:
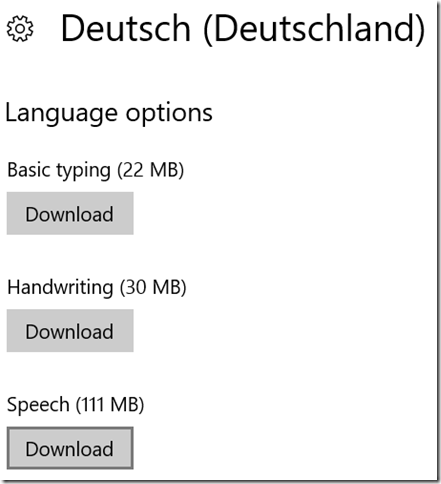
As you can see, speech data for German takes about 111 MB to download. Once it is installed, it’ll appear on the list.
If you don’t like the default voice, you can either pick another one based on its ID or one of its attributes like gender or language; the following code snippet pick the first available female voice or falls back to the default voice if no female voices were found:
var voice = SpeechSynthesizer.AllVoices.SingleOrDefault(i => i.Gender == VoiceGender.Female) ?? SpeechSynthesizer.DefaultVoice;
The DefaultVoice static property will give you the default voice for the current platform settings in case your query fails.
When you have your voice selected, assign it to SpeechSynthesizer:
synthesizer.Voice = voice;
What’s Coming with Windows 10 Fall Creators update
There are additional options you can set to SpeechSynthesizer. Adding to existing IncludeSentenceBoundaryMetadata and IncludeWordBoundaryMetadata properties, the forthcoming Windows 10 Fall Creators update is looking to add some new interesting ones: AudioPitch will allow altering the pitch of synthesized utterances (change to higher and lower tones), AudioVolume will be used to individually control the volume and SpeakingRate to alter the tempo of spoken utterances. To try those now, you need to be on latest Windows 10 Insider Preview (Windows 10 IoT Core version is available from here) and at least Windows SDK build 16225.
I’m running the latest stable Windows 10 IoT Core version on my home Raspberry Pi so for now I’ll stick to using the latest stable version of SDK (Windows 10 Creators update or build 15063).
To continue with the code, this is how I’ve implemented the CreateSpeechSynthesizer method:
private static SpeechSynthesizer CreateSpeechSynthesizer()
{
     var synthesizer = new SpeechSynthesizer();
     var voice = SpeechSynthesizer.AllVoices.SingleOrDefault(i => i.Gender == VoiceGender.Female) ?? SpeechSynthesizer.DefaultVoice;
     synthesizer.Voice = voice;
     return synthesizer;
}
Speech
It only takes a few lines to actually produce something with SpeechSynthesizer: add a MediaPlayer to the SpeechService class, along with the new SayAsync method:
private readonly SpeechSynthesizer speechSynthesizer;
private readonly MediaPlayer speechPlayer;

public SpeechService()
{
    speechSynthesizer = CreateSpeechSynthesizer();
   speechPlayer = new MediaPlayer();
}

public async Task SayAsync(string text)
{
    using (var stream = await speechSynthesizer.SynthesizeTextToStreamAsync(text))
    {
        speechPlayer.Source = MediaSource.CreateFromStream(stream, stream.ContentType);
    }
    speechPlayer.Play();
}
Let’s take a closer look to the SayAsync method. The SynthesizeTextToStreamAsync method does the actual speech synthesis - it turns text to spoken audio stream. That stream is assigned to MediaPlayer’s Source property and played using the Play method.
Easy.
Ready to tell time
We need another method for telling time, here’s an example:
public async Task SayTime()
{
     var now = DateTime.Now;
     var hour = now.Hour;
    string timeOfDay;
     if (hour <= 12)
     {
         timeOfDay = "morning";
     }
     else if (hour <= 17)
     {
         timeOfDay = "afternoon";
     }
     else
     {
         timeOfDay = "evening";
     }
    if (hour > 12)
     {
         hour -= 12;
     }
     if (now.Minute == 0)
     {
         await SayAsync($"Good {timeOfDay}, it's {hour} o'clock.");
     }
     else
     {
         await SayAsync($"Good {timeOfDay}, it's {hour} {now.Minute}.");
     }
}
And the last thing to add is a way to invoke the above method on proper intervals. This is my full StartupTask class for reference:
public sealed class StartupTask : IBackgroundTask
{
     private BackgroundTaskDeferral deferral;
     private Timer clockTimer;
     private SpeechService speechService;
    public void Run(IBackgroundTaskInstance taskInstance)
     {
         deferral = taskInstance.GetDeferral();
        speechService = new SpeechService();
        var timeToFullHour = GetTimeSpanToNextFullHour();
         clockTimer = new Timer(OnClock, null, timeToFullHour, TimeSpan.FromHours(1));
        speechService.SayTime();
     }
    private static TimeSpan GetTimeSpanToNextFullHour()
     {
         var now = DateTime.Now;
         var nextHour = new DateTime(now.Year, now.Month, now.Day, now.Hour, 0, 0).AddHours(1);
         return nextHour - now;
     }
    private async void OnClock(object state)
     {
         await speechService.SayTime();
     }
}
Timer will fire every hour and your device will tell the time. Feel free to experiment with other shorter time spans to get hear it tell the time more often.
Deploying to a device
There are many ways to deploy your app to an IoT Core device, but I usually find it easiest to deploy from within Visual Studio.
Open project’s Property pages and select Debug page. Find the Start options section, select Remote Machine as Target Device and hit the Find button. If your device is online, it will be listed in the Auto Detected list. Select it, leaving Authentication Mode to Universal.

Select Debug | Start Without Debugging or simply press CTRL+F5 to deploy application without debugger attached. With speakers or headphones attached to the device, you should hear the time immediately after application is successfully deployed.
You can also check the application status on the Windows Device Application Portal:

Hit the switch in the Startup column to On if you want the background application automatically start whenever device boots up.
Audio issues
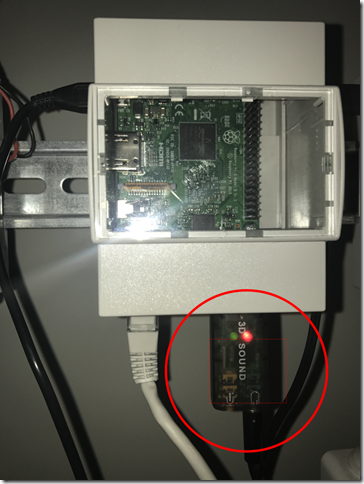
When I first tried playing audio through Raspberry Pi, there were annoying clicks playing before and after voice was spoken. I’ve solved that with a cheap, 10$ USB audio card. Plus I’ve gained a mic input.
Wrap up
We’ve created a small background app that literally tells time, running on a number of small devices that support Windows 10 IoT Core. In future posts, I’ll add additional features, some of them I’ve introduced in the beginning of this blog post.
Full source code from this post is available on github.
You can also read part 2 of this post here.