Andrej Tozon's blog

In the Attic

NAVIGATION - SEARCH

Weight Watching

If you followed me on Twitter you’d know about my latest little “problem”. I decided not to wait another month for my New Year’s resolutions, but start losing that extra weight right away. To help me keep my score, I created a little Silverlight app, showing my progress visually, through a line chart. Since charts were introduced in recently released Silverlight Toolkit, this was a very simple task.

All I had to do was:

1. Create a SQL 2008 database to keep my weight history in. The key idea here ware daily updates…
2. Expose data as a service (WCF, what else)
3. Build a Silverlight front end, which would consume this data service and present the data using the Chart bits from Silverlight Toolkit.

After browsing through some of the enclosed samples, it all boiled down to just these few lines of Xaml:

<UserControl 
    x:Class="WeightWatch.Page"
    xmlns="http://schemas.microsoft.com/winfx/2006/xaml/presentation" 
    xmlns:x="http://schemas.microsoft.com/winfx/2006/xaml" 
    xmlns:local="clr-namespace:WeightWatch"
    xmlns:charting="clr-namespace:Microsoft.Windows.Controls.DataVisualization.Charting;
                    assembly=Microsoft.Windows.Controls.DataVisualization"
    Width="600" Height="300">
    <UserControl.DataContext>
        <local:ViewModel />
    </UserControl.DataContext>
    <Grid x:Name="LayoutRoot">
        <charting:Chart Title="Andrej's Weight Watch" LegendTitle="Legend">
            <charting:Chart.Series>
                <charting:LineSeries
                        Title="Running Weight"
                        ItemsSource="{Binding RunningWeight}"
                        IndependentValueBinding="{Binding Date}"
                        DependentValueBinding="{Binding Weight}" />
                <charting:LineSeries
                        Title="Target Weight"
                        ItemsSource="{Binding TargetWeight}"
                        IndependentValueBinding="{Binding Date}"
                        DependentValueBinding="{Binding Weight}" />
            </charting:Chart.Series>
        </charting:Chart>
    </Grid>
</UserControl>

With the exception of the ViewModel, which is responsible of fetching the data from the service, there was absolutely no additional code required for this to work. Simplicity at its best. There’s of course much more to this than just displaying static data lines in a box; I have a long way to lose those 10+ kilos, which will give me plenty of time to update this sample with some new features.

And here's my progress:

Integrating Silverlight with Community Server 2008.5

I’m sure Telligent will fully enable Silverlight parts into future Community Server releases, but until then, a couple of tricks are needed to make Silverlight play well with CS. The following points were made with Community Server 2008.5 release.

Include Silverlight apps in posts

The common way to include Silverlight in CS posts is by using HTML iframes. CS is blocking this tag by default so you have to edit communityserver.config file and enable it. Look for the <Markup> tag and go to the <Html> section within it. Add the iframe line somewhere to that section:

<iframe src = "true" frameborder = "true" width = "true" height = "true" />

Only attributes with values set to “true” will be allowed so don’t forget to add the attributes you plan to set on an iframe.

Next, upload the Silverlight app to a web site folder. The files to upload are usually the application’s [app].html (host page), [app].xap (application) and Silverlight.js (JavaScript helper library). Make sure that the uploaded .html file is accessible through the web and the app is working.

The last step is an easy one. Insert the iframe in your post wherever you want to put your Silverlight application. You’ll most commonly do that when editing posts in Html view. I usually put another div tag around an iframe:

<div style="width:100%;height:200px">
  <iframe src="/silverlight/app.html" frameborder="0" width="100%" height="200" />
</div>

Putting Silverlight into CS master page

This one requires some more manual work, but you can use CS’s master page’s system to control where you want to include Silverlight. As I needed to have Silverlight-enabled on all pages, I picked the Master.master file. I also used a different approach for embedding Silverlight – instead of iframe, I used a new Silverlight ASP.NET control, which makes things much easier. You’ll get this control in your toolbox once you install Silverlight SDK. This approach, however, will require you to “upgrade” your web.config to target .NET Framework 3.5. You can either do this manually by copying all the missing sections and other entries into it or by opening the site with Visual Studio 2008 – Visual Studio usually prompts for this kind of upgrade when opening ASP.NET 2.0 projects. You should also add the following reference line into the pages/controls section to make Silverlight possible on every page:

<add assembly="System.Web.Silverlight" namespace="System.Web.UI.SilverlightControls" tagPrefix="asp" />

My edit of Master.master file now looks like this:

... <div id="CommonHeader"> <asp:ScriptManager ID="ScriptManager1" runat="server" /> <asp:Silverlight ID="sl" runat="server" Source="/Silverlight/banner.xap"
Height="100%" Width="100%" Windowless="true" />
<div class="Common"> ...

[inserted lines bold]

Because of the inserted Silverlight control, all existing header contents were pushed further down. To fix this, override affected elements’ CSS style. You’ll do this on the Control Panel | System Administration | Site Administration | Site Theme | Custom Styles (Advanced) page. Just enter the overrides:

#CommonHeaderTitleArea
{
    position: relative;
    top: -113px;
}
#CommonHeaderUserArea
{
    position: relative;
    top: -113px;
}

[Note: my header has its height set to default – 113px, so I had to push it (-)113px up. Change this value according to your header height.

These were just very quick (and dirty) fixes to enable Silverlight in your CS2008.5 site until Silverlight gets native support in Community Site. I’ll most likely be putting even more Silverlight into my CS so I may update this post with even more tips.

Developing for ASP.NET mobile

Visual Studio 2008 introduced a lot of new features to support new technologies, adding some cool new designers to developer’s tool belt. On the other hand, support for some technologies was simply left out, leaving a some developers very unhappy. One of those was support for SQL Server 2005 BI projects (including 2005 Reporting Services).

A (long) year after its release, I learned that there was another feature dropped in VS2008 – support for designing ASP.NET mobile web forms. This doesn’t mean you can’t develop, compile and publish ASP.NET mobile forms; it simply means they pulled out the designer and mobile forms item templates out of Visual Studio 2008. Getting item templates back is the easy part, you can get them here. For the design view support, I’m not currently aware of any plans to put it back in the future.  But really – with mobile browsers getting more powerful each day, capable of rendering rich(er) (x)html, do we still need the simplicity and extendibility of ASP.NET mobile forms? For the time being, the answer may still be yes, if you’re planning to support a wide range of mobile devices. Whatever the future, the current (un)support for ASP.NET mobile in Visual Studio works for me. It’s true that I’m unable to design mobile forms in design view, but I do that rarely even with their bigger brother - ASP.NET web forms.

ASP.NET? Mobile?

Strangely enough, I’m doing more web than client development lately. Go figure.

Speaking of webby/clienty things… Silverlight 2.0 RC0 was just made available. Downloads include Microsoft Silverlight Tools for Visual Studio 2008 SP1 and Microsoft Expression Blend 2 Service Pack 1 Preview. Note that Microsoft Expression Blend 2 SP1 is a replacement for Expression 2.5, which is no more.

Until we meet again...

You left so sudden
I couldn't even say goodbye.
You've lived a hard life,
but did everything
to make mine easier.
Your faith, courage and love
will continue to live on
through your words and wishes:
"Love one another".

I'll miss you, Mom!

Creating splash screens with Expression Designer

Did you know you can create cool looking splash screens for your WPF application right there with the Expression Designer?

Of course you did. Expression Designer provides you with all you need to create free-shaped, part-transparent, drop-shadowed graphics and I bet the the WPF splash screen support is going to be baked into the next release of Expression Blend as well.

This is a quick walk through designing a splash screen with the Expression Designer.

1. With Expression Designer open, create a new rectangle and set its Corner Radius property to about 30px (depending your rectangle’s size).

2. Set rectangle’s color to match your application theme and make it a bit transparent by setting Opacity to around 70%.

Rectangle

3. Find the Effects property section and click the Add Effect button. Choose Effects | Drop Shadow.

Add Effect

4. Decrease Softness and Offset and increase Opacity properties to make the shadow more compact. You will end up with something like this:

Drop Shadow and Transparence

5. Create a new layer and put a new rectangle on it. Make it the same size as the first one and put it on the same spot to make them both aligned exactly.

6. Set its stroke to None and fill it with a transparent gradient: First Stop Alpha: 80%, Second Stop Alpha: 0%.

7. Move gradient’s origin more to the side and make it larger.

Gradient

Your rectangle should now look just a little bit more exciting:

Light source

8. Time for some text… With the Text tool, create your application title. I’ve chosen 36 pt Arial Rounded MT Bold font with white color fill. Applying some transparency to the text will make it absorb some background color for a more glassy look. You could add some Outer Glow Effect to make it even cooler.

9. Add all other text you want to show in your splash screen. Here’s what I got so far:

Title & Text

10. If you have any graphics that could communicate to the user what your application is all about, you could use that as well. It might also be a screenshot from the actual application if you can’t find anything better. I used a screenshot of my sample Live Europe Weather Map application. Adding a bitmap to the existing Expression Design project is really easy – just select File | Import… and open your graphics - it will get added to the current layer so you will probably want to create a new layer before doing that. And don’t forget to set some transparency to that as well:

Bitmap

11. Almost done. To break out of dull symmetric rectangly shape, you can mix in some additional decorations, like I did to point out that this is a whole new version of the application [the yellow badge is from the bittbox badges collection:
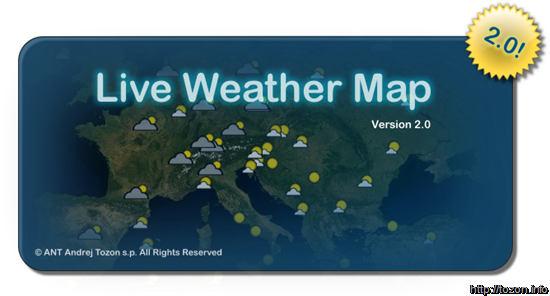
 Final Splash

And this is the final result for now. We’ve got transparency, irregular shape, drop shadow… Of course, this works for a sample, but for a real-world application I would have to put some additional work into it; pay more attention to the details, colors, gradients, etc.

12. When satisfied with your work, just select all objects, select File | Export… and choose PNG as your target format. After the file is saved on your disk, all you need is incorporate it in your WPF application.

Expression Design offers a lot more effects and options that were shown in this quick walkthrough. I am particularly happy to see how easy it is to play with different effects, mixing and layering them in different combination. There is, of course, also export to different Xaml instances, which makes it even more sweet.

While writing this post, I noticed that the WPF team published a new WPF Splash Screen Item Templates for Visual Studio 2008 SP1. This gives you additional option to add a splash screen to your WPF application – a new (Splash Screen (WPF)) item will be available in your templates window when adding a new item. Selecting that will insert a default graphics to your project and set it as the splash screen. You’ll have to customize the graphics yourself though. This is a nice option, although I’d like to see some form of a wizard with some styling options, font/title selections, etc… In the next version of Visual Studio perhaps…

Splash Screen in WPF 3.5 SP1

Besides improving application startup time, .NET Framework 3.5 SP1 also allows developers to add a splash screen to WPF applications. The splash screen is shown using native code, even before WPF application starts to load. In reality this means the splash screen would show immediately when application is started, and fade away a couple of seconds later, when application is fully loaded and main screen displayed.

WPF Splash screen is just and nothing more than a plain bitmap image. Common formats are supported, and if you use a PNG format with a specified alpha channel, transparent areas will be shown accordingly. Just remember to keep it small. Choosing a couple of megabytes large bitmap for your splash screen won’t reduce the loading time. Adding additional information to the image during runtime (title, version number) is also not possible; everything you want to show should be designed in advance and incorporated into a single image.

WPF splash screens can be added to an application in two ways:

Showing splash screen manually

1. Create a new PNG image, which will be your splash screen.

2. Start your Visual Studio 2008 SP1 and create a new WPF project. [make sure .NET 3.5 is specified as the target FX]

3. Choose Project | Add Existing Item… Find and select your splash screen image.

4. Open App.xaml file in design view and look in the properties window ;)

Events in VS2008 WPF designer

Yes, there’s an event panel in WPF designer! And properties/events sorting option buttons!

5. Create a Startup event handler:

   1: private void Application_Startup(object sender, StartupEventArgs e)
   2: {
   3:     SplashScreen screen = new SplashScreen("sp1splash.png");
   4:     screen.Show(true);
   5: }

6. Compile and run.

The SplashScreen constructor takes the name of the resource, which is a splash screen image. The boolean parameter in the Show() method specifies, whether the splash screen should fade out when application is fully loaded. False means you’ll have to hide the splash screen manually using the Close() method.

If you don’t like writing code, this gets even easier:


Showing splash screen declaratively

1. Create a new PNG image, which will be your splash screen.

2. Start your Visual Studio 2008 SP1 and create a new WPF project. [make sure .NET 3.5 is specified as the target FX]

3. Choose Project | Add Existing Item… Find and select your splash screen image.

4. Select the newly added image in the solution explorer and show its properties.

5. Change the Build Action to SplashScreen.

6. Compile and run.

The splash screen shows immediately upon the application startup and fades out when the main window is loaded and shown. How’s that for cool new user experience :)


Additional note: SplashScreen class works in WPF desktop apps only, XBAPs have their own mechanism for starting up.

Live Europe Weather Map in action

As promised, here’s my Live Europe Weather Map in action. This is still just a basic example of displaying icon pushpins on a map, and because I’m using Virtual Earth ASP.NET Map Control, I don’t need to worry about how map is handled and pushpins are displayed, I only need to provide data for the pushpins.

Live Europe Weather Map 

The first version of the Weather Map from a couple of years ago used to scrape the data off a Html Page. Recently, the National Environmental Agency started publishing weather data in a more collection-friendly data formats, so I switched to these.

The current version of Live European Weather Map collects Xml files, containing weather observations for European Capitals and additional cities.

Data Collection

I decided to go with LINQ to SQL option for shaping my data entity. Some may argue that LINQ to SQL isn’t a serious technology, but for small, compact projects like this, it gives me just what I need:

1. Instead of generating my data classes manually, I can create a table in my database (SQL Express in this case) and pull my classes out of that.

2. I can create my data entity by drag and dropping a table from the data source to the LINQ to SQL Class Designer in Visual Studio 2008, and my data class would get generated automatically. Here's what I’m currently collecting for weather conditions:

image

3. I can use this class to collect the data and store in into the database, or I can simply just store the collected data into ASP.NET Cache and forget the database completely.

Of course, I could’ve done it some other way (plenty of options), but this one seemed the easiest and quickest.

Weather data collection is done in a background, with a HttpModule and a timer, set to fire the collection process every 60 minutes (configurable through web.config):

   1: public void Init(HttpApplication application)
   2: {
   3:     int interval = GetCollectIntervalSetting();
   4:  
   5:     if (timer == null &&  interval > 0)
   6:     {
   7:         timer = new Timer(new TimerCallback(BackgroundCollectionCallback), application.Context, 0, interval);
   8:     }
   9: }
  10:  
  11: private void BackgroundCollectionCallback(object sender)
  12: {
  13:     WeatherCollector.UpdateConditions();
  14: }

Using LINQ to SQL, collected data is inserted into the database:

   1: public static void UpdateConditions()
   2: {
   3:     List<WeatherCondition> items = Collect();
   4:  
   5:     WeatherDataContext context = new WeatherDataContext();
   6:     context.ExecuteCommand("delete dbo.WeatherCondition");
   7:     context.WeatherConditions.InsertAllOnSubmit(items);
   8:     context.SubmitChanges();
   9: }

… and later read from it:

   1: public static WeatherCondition[] Read()
   2: {
   3:     WeatherDataContext context = new WeatherDataContext();
   4:     var conditions = from item in context.WeatherConditions
   5:                      select item;
   6:     return conditions.ToArray();
   7: }

… just to finally get shown on the map:

   1: protected void Page_Load(object sender, EventArgs e)
   2: {
   3:     if (IsPostBack)
   4:     {
   5:         return;
   6:     }
   7:  
   8:     AddWeatherPins();
   9: }
  10:  
  11: private void AddWeatherPins()
  12: {
  13:     WeatherCondition[] conditions = WeatherCollector.Read();
  14:  
  15:     for (int i = 0; i < conditions.Length; i++)
  16:     {
  17:         WeatherCondition condition = conditions[i];
  18:         if (condition.ConditionIcon == null || condition.ConditionIcon.Length == 0)
  19:         {
  20:             continue;
  21:         }
  22:  
  23:         AddPin(condition);
  24:     };
  25: }
  26:  
  27: private void AddPin(WeatherCondition condition)
  28: {
  29:     StringBuilder sb = new StringBuilder();
  30:     sb.AppendFormat("<p><b>{0} {1}</b>, {2}", condition.Temperature, condition.TemperatureUnit, condition.Condition);
  31:     if (condition.Weather.Length > 0)
  32:     {
  33:         sb.AppendFormat(", {0}", condition.Weather);
  34:     }
  35:     sb.Append("<br />");
  36:     if (condition.WindStrength.HasValue)
  37:     {
  38:         sb.AppendFormat("Wind: {0}, {1} {2}<br />", condition.WindDirection, condition.WindStrength, condition.WindStrengthUnit);
  39:     }
  40:     if (condition.Humidity.HasValue)
  41:     {
  42:         sb.AppendFormat("Humidity: {0} {1}<br />", condition.Humidity, condition.HumidityUnit);
  43:     }
  44:     if (condition.Visibility.HasValue)
  45:     {
  46:         sb.AppendFormat("Visibility: {0} {1}<br />", condition.Visibility, condition.VisibilityUnit);
  47:     }
  48:     if (condition.Pressure.HasValue)
  49:     {
  50:         sb.AppendFormat("Pressure: {0} {1} {2}<br />", condition.Pressure, condition.PressureUnit, condition.PressureText);
  51:     }
  52:     sb.AppendFormat("<br />Updated: {0}</p>", condition.UpdatedTime);
  53:  
  54:     Shape pin = new Shape(ShapeType.Pushpin, new LatLongWithAltitude((double)condition.Latitude, (double)condition.Longitude));
  55:     pin.Title = string.Format("{0}, {1}", condition.City, condition.CountryCode);
  56:     pin.CustomIcon = string.Format("images/{0}.png", condition.ConditionIcon);
  57:     pin.Description = sb.ToString();
  58:     map.AddShape(pin);
  59: }

Note that a large portion of the code is spent for describing pushpin’s popup content.

Again, this is just a drag’n’dropped Virtual Earth Map Control put to work here, without any specific client or server-side events. Looking forward to explore those in the future.

VSM4WPF

While next release of WPF (3.5 SP1) won't yet align with Silverlight's "Parts & States Model"  by not introducing VisualStateManager into its API, it's good to know that VSM is definitely coming to WPF. Even more, John Gossman has just released a prototype of his VisualStateManager for desktop WPF, which is compatible with Silverlight Beta 2 VSM implementation.

Before VSM is built into the core of WPF, this prototype lets us explore and play with this "new way" of controls' state transitioning in WPF applications. Sweet.